
FlynCache
Complete Setup & Support Guide
──────────────────────────────
Nginx FastCGI Cache & Redis Object Cache Manager for WordPress
Author: Wasim Akram
Version 1.0.0
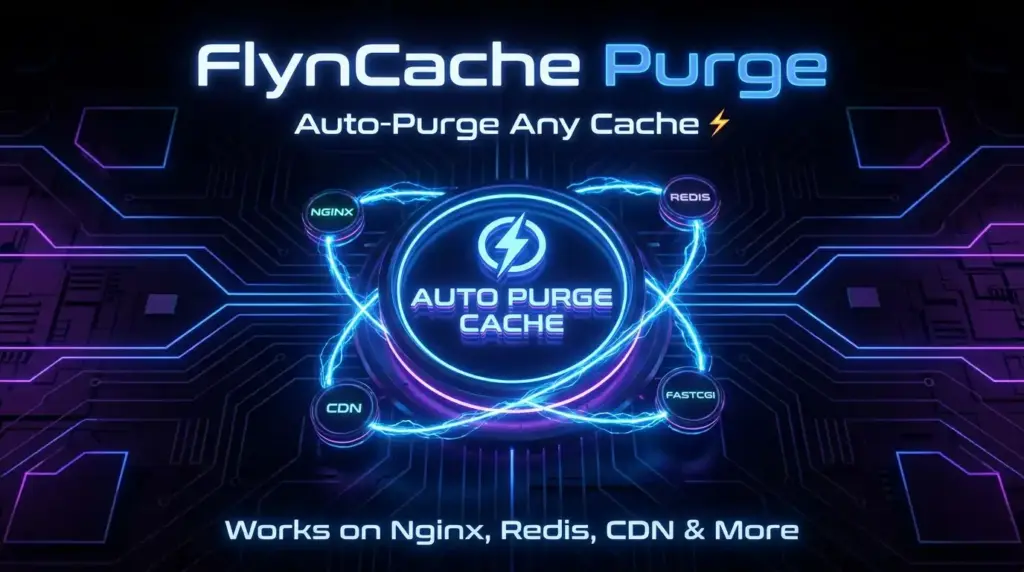
1. Introduction to FlynCache
What is FlynCache?
FlynCache is a comprehensive WordPress plugin designed to simplify the management of Nginx FastCGI Cache and Redis Object Cache directly from your WordPress admin dashboard. For WordPress sites running on Nginx, achieving lightning-fast page load times is critical, and FlynCache provides the tools to make that happen without requiring manual server configuration for every cache operation.
With FlynCache, you can control your Nginx FastCGI cache paths, automatically detect the correct cache directory on your server, purge cached content when posts or pages are updated, and configure Redis as a persistent object cache backend. All of this is managed through an intuitive, modern interface built right into the WordPress admin area.
Why Was It Created?
Managing Nginx FastCGI cache in WordPress has traditionally required SSH access, manual command-line operations, and deep technical knowledge of Nginx configuration. There was no easy way for WordPress administrators to control cache purging, monitor cache status, or manage Redis object caching without diving into terminal commands and configuration files.
FlynCache was created to bridge this gap. The plugin brings server-level caching controls into the familiar WordPress dashboard, making advanced caching accessible to site owners, developers, and administrators regardless of their server expertise. It eliminates the need to SSH into your server every time you need to purge cache after updating content.
Who Is It For?
- WordPress site owners who want faster page loads without complexity
- Developers managing Nginx-powered WordPress installations
- System administrators looking for a GUI to manage FastCGI cache
- Anyone using Redis for WordPress object caching
- Agencies managing multiple WordPress sites on Nginx servers
Key Benefits
- Lightning-Fast Performance: Serve cached pages directly from Nginx without hitting PHP at all, reducing server load dramatically.
- Automatic Cache Purging: Cache is automatically cleared when content is updated, ensuring visitors always see fresh content.
- Redis Object Cache: Full Redis integration with connection testing, server info display, and one-click enable/disable.
- Smart Auto-Detection: Automatically detects your Nginx cache paths and Redis server configuration.
- Detailed Cache Logs: Track every purge action with filterable logs and CSV export capability.
Plugin Homepage:
2. System Requirements
Before installing FlynCache, please ensure your server environment meets the following minimum requirements. FlynCache is designed to work with standard WordPress installations running on Nginx web servers. While Redis support is optional, having it configured will significantly enhance your site’s performance by providing a persistent object cache backend.
| Requirement | Details |
|---|---|
| WordPress | Version 5.0 or higher |
| PHP | Version 7.4 or higher (PHP 8.x recommended) |
| Web Server | Nginx with FastCGI cache configured |
| Redis | Optional – phpredis extension or Predis library |
| Server Access | Shell access or proper file permissions for cache directories |
| Permissions | Write access to Nginx cache directory for purge operations |
Table 1: FlynCache System Requirements
It is strongly recommended to use PHP 8.0 or later for the best performance and security. While FlynCache will work with PHP 7.4, newer PHP versions provide significant performance improvements that complement the caching benefits of Nginx FastCGI cache and Redis.
3. Installation
Installing FlynCache is a straightforward process that takes just a few minutes. The plugin is available on WordPress.org, making installation as simple as any other WordPress plugin. Follow these steps to get FlynCache up and running on your site.
Step 1: Download from WordPress.org
Navigate to your WordPress admin dashboard and go to Plugins > Add New. In the search box, type “FlynCache” and press Enter. Look for the FlynCache plugin by Wasim Akram in the search results. Click the “Install Now” button to begin the installation process. Alternatively, you can download the plugin directly from the WordPress.org plugin repository and upload it manually.
Step 2: Upload and Activate
If you prefer manual installation, download the plugin ZIP file from WordPress.org. Then go to Plugins > Add New > Upload Plugin, choose the downloaded ZIP file, and click “Install Now.” Once the installation is complete, click the “Activate Plugin” link that appears, or go to the Plugins page and click “Activate” under FlynCache.
Step 3: Find FlynCache in Admin Menu
After activation, you will see a new “FlynCache” menu item in your WordPress admin sidebar. Click on it to access the FlynCache dashboard, where you can configure your Nginx cache settings, Redis object cache, auto-purge rules, and more. The dashboard provides an at-a-glance overview of your caching status and system requirements.
Figure 1: FlynCache Dashboard Overview
The dashboard shows the current status of your Nginx cache, Redis connection, system requirements check, and quick actions. Green indicators mean everything is working correctly, while red or yellow indicators highlight areas that need attention.
4. Nginx FastCGI Cache Setup
Nginx FastCGI cache is one of the most powerful caching mechanisms available for WordPress. Unlike page caching plugins that still require PHP to serve cached content, FastCGI cache stores entire HTML responses at the Nginx level, meaning cached pages are served directly by Nginx without PHP or WordPress ever being invoked. This results in extremely fast page loads and significantly reduced server resource usage.
Step 1: Navigate to Nginx Cache Settings
From your WordPress admin sidebar, click on FlynCache > Nginx Cache. This will open the Nginx cache configuration page where you can set up and manage your FastCGI cache paths. The page provides a clean interface for managing all aspects of your Nginx cache configuration.
Step 2: Auto-Detect Cache Paths
Click the “Auto-Detect Cache Paths” button to let FlynCache scan your server for Nginx cache directories. The plugin will search common Nginx cache locations and display all detected paths. This feature eliminates the need to manually locate your cache directory through SSH or file manager, saving time and reducing the chance of configuration errors.
Step 3: Review and Select Recommended Path
After the scan completes, FlynCache will display a list of detected cache paths. Each path will show its status (active or inactive) and whether it is writable. The plugin will highlight the recommended path based on your server configuration. Select the recommended path by clicking on it, or choose a different path if you have a specific preference.
Step 4: Save Settings
Once you have selected your cache path, click “Save Settings” to apply the configuration. FlynCache will verify that the path is accessible and writable, then store your selection. The plugin will use this path for all subsequent cache purging operations.
Step 5: Verify Cache Is Working
After saving your settings, visit your website’s frontend and load a few pages. Then return to the FlynCache dashboard to check the cache status. You should see that pages are being cached. You can also check the Nginx response headers to confirm that the FastCGI cache is serving content correctly.
Step 6: Manual Purge Options
FlynCache provides several manual purge options for situations where you need to immediately clear cached content. You can purge the entire cache with one click, purge specific URLs, or use the admin bar purge button to clear the cache for the page you are currently viewing. The manual purge options are accessible from the Nginx Cache settings page and the WordPress admin bar.
Figure 2: Nginx FastCGI Cache Settings Page
Nginx Configuration Reference
To use FlynCache effectively, your Nginx server must be configured with FastCGI cache. Below is a reference configuration. Place the fastcgi_cache_path directive in the http block of your Nginx configuration (typically /etc/nginx/nginx.conf), and the remaining directives in your server block configuration.
fastcgi_cache_path /var/run/nginx-cache levels=1:2 keys_zone=WORDPRESS:100m inactive=60m max_size=1g;
fastcgi_cache_key “$scheme$request_method$host$request_uri”;
fastcgi_cache_valid 200 301 302 60m;
fastcgi_cache_bypass $skip_cache;
fastcgi_no_cache $skip_cache;
Troubleshooting Common Issues
- Cache path not found: Ensure your Nginx configuration includes a fastcgi_cache_path directive and that the directory exists on the server. Check /etc/nginx/nginx.conf for the cache path definition.
- Permission denied: The PHP process user (usually www-data) needs write access to the cache directory. Run: sudo chown -R www-data:www-data /var/run/nginx-cache
- Cache not purging: Verify the cache path in FlynCache matches the actual fastcgi_cache_path in your Nginx config. Also check that FlynCache has detected the correct cache zone name.
- Logged-in users seeing cached pages: This is typically a Nginx configuration issue. Ensure your fastcgi_cache_bypass and fastcgi_no_cache directives include the WordPress logged-in cookie check.
5. Redis Object Cache Setup
Redis is an in-memory data store that can dramatically speed up WordPress by caching database queries and expensive operations. When enabled as a WordPress object cache, Redis stores the results of database queries in memory, eliminating the need to repeatedly query the database for the same data. This is especially beneficial for sites with heavy database usage, complex queries, or high traffic volumes.
Step 1: Install Redis Extension
Before configuring FlynCache, ensure that either the phpredis PHP extension or the Predis PHP library is available on your server. For phpredis, you can install it via your package manager (e.g., sudo apt install php-redis) or by compiling it from source. Predis is a pure PHP implementation and can be installed via Composer. FlynCache supports both and will automatically detect which one is available.
Step 2: Configure Redis Connection
Navigate to FlynCache > Redis Cache in your WordPress admin. Here you will find fields for configuring your Redis connection. The default settings use localhost on port 6379 with database index 0, which works for most standard Redis installations. If your Redis server uses different settings, update the host, port, and database values accordingly. You can also configure a Redis password if your server requires authentication.
Step 3: Test Connection
After entering your Redis connection details, click the “Test Connection” button. FlynCache will attempt to connect to your Redis server and verify that it is accessible. A successful connection test confirms that Redis is running, accessible from your web server, and ready to be used as an object cache backend. If the test fails, check your Redis server status and connection parameters.
Step 4: Save Settings and Enable
Once the connection test passes, click “Save Settings” to store your Redis configuration. You can then enable the Redis object cache by toggling the enable switch. FlynCache will configure WordPress to use Redis as the object cache backend, and you should see an immediate improvement in page generation times for database-heavy operations.
Step 5: View Redis Server Info
FlynCache provides a Redis server info panel that displays key metrics about your Redis instance, including memory usage, connected clients, uptime, hit/miss ratios, and more. This information helps you monitor the health and performance of your Redis server directly from the WordPress admin.
Figure 3: Redis Object Cache Settings Page
Common Redis Configurations
| Parameter | Default Value | Notes |
|---|---|---|
| Host | 127.0.0.1 | Use localhost for same-server |
| Port | 6379 | Default Redis port |
| Database | 0 | Redis has 16 databases (0-15) |
| Password | (empty) | Set if Redis requires auth |
| Prefix | wp_ | Avoids key collisions |
Table 2: Common Redis Configuration Parameters
Troubleshooting Redis Issues
- Connection refused: Ensure Redis server is running: sudo systemctl status redis. If not running, start it with: sudo systemctl start redis.
- PHP extension not found: Install phpredis: sudo apt install php-redis, then restart PHP-FPM: sudo systemctl restart php-fpm.
- High memory usage: Configure Redis maxmemory setting in redis.conf and set an eviction policy like allkeys-lru.
6. Auto-Purge Configuration
One of the most powerful features of FlynCache is its automatic cache purging system. When enabled, FlynCache monitors your WordPress site for content changes and automatically purges the relevant cache entries. This ensures that visitors always see the most up-to-date content without any manual intervention. The auto-purge system is highly configurable, allowing you to choose exactly which events trigger a cache purge.
Step 1: Access Auto Purge Settings
Navigate to FlynCache > Auto Purge in your WordPress admin sidebar. This page displays all available purge triggers organized into logical categories: content updates, comment activity, site changes, and additional purge targets.
Step 2: Apply Recommended Settings
For most users, the easiest approach is to click the “Apply Recommended Settings” button. This will enable a set of carefully chosen purge triggers that cover the most common scenarios. These recommended settings ensure that your cache stays fresh when content is updated, while avoiding unnecessary purges that could reduce caching efficiency.
Step 3: Customize Individual Triggers
If you prefer fine-grained control, you can individually toggle each purge trigger on or off. This is useful if you want to enable purging for specific events while leaving others disabled. For example, you might want to purge the cache when posts are published but not when comments are approved.
Content Update Triggers
These triggers control cache purging when content is created, modified, or deleted on your site:
- Publish Post: Purges the cache when a new post is published. This ensures visitors see the new content immediately.
- Update Post: Purges the cache when an existing post is edited and updated. Important for maintaining content accuracy.
- Delete Post: Purges the cache when a post is deleted, preventing 404 errors for cached pages linking to the deleted content.
- Publish/Edit/Delete Page: Same as post triggers but for WordPress pages. Ensures static pages like About and Contact stay current.
Comment Activity Triggers
These triggers control cache purging related to comment activity on your site:
- New Comment: Purges the cache when a new comment is posted. Updates the comment count and comment display.
- Approve Comment: Purges the cache when a comment is approved. Makes the approved comment visible to visitors.
- Delete Comment/Spam: Purges the cache when a comment is deleted or marked as spam.
Site Change Triggers
These triggers control cache purging when broader site changes occur:
- Theme Switch: Purges all cache when the active theme is changed, as the visual output will be different.
- Plugin Activation/Deactivation: Purges all cache when plugins are activated or deactivated, as they may alter page output.
- Widget Update: Purges the cache when widgets are added, removed, or rearranged.
Additional Purge Targets
These settings let you define additional URLs that should be purged alongside content updates:
- Front Page: Always purge the homepage when any content is updated, keeping the front page showing latest content.
- Archive Pages: Purge category, tag, date, and author archive pages when related content changes.
- Custom URLs: Add specific URLs that should always be purged when any content update occurs.
Figure 4: Auto-Purge Configuration Settings
Best Practices
- Start with the recommended settings and only customize if you have specific requirements.
- Enable front page purging if your homepage displays recent posts or dynamic content.
- Disable comment triggers on sites that do not allow comments to reduce unnecessary purges.
- Monitor the cache logs regularly to understand which triggers are firing and how often.
- After making changes to auto-purge settings, test by publishing a new post and verifying the cache is properly purged.
7. Dashboard Overview
The FlynCache dashboard is your central command center for monitoring and managing your WordPress caching setup. It provides a comprehensive overview of your caching status, system health, and quick access to all FlynCache features. When you first visit the dashboard, you will see a series of status cards that give you an instant snapshot of your caching configuration.
Status Cards
The dashboard displays several status cards, each providing key information:
- Nginx Cache Status: Shows whether Nginx FastCGI cache is enabled, the configured cache path, and the cache zone name. A green indicator means the cache is active and properly configured.
- Redis Cache Status: Displays the connection status to your Redis server, including whether Redis object cache is enabled and key performance metrics like hit ratio and memory usage.
- System Requirements: A checklist showing whether your server meets all the requirements for optimal FlynCache operation, including PHP version, Nginx status, and Redis availability.
Quick Actions
The dashboard includes quick action buttons for the most common operations:
- Purge All Nginx Cache – Clears the entire FastCGI cache instantly.
- Purge All Redis Cache – Flushes all Redis object cache data.
- Test Redis Connection – Verifies that your Redis server is accessible and responding.
- Auto-Detect Paths – Re-scans your server for Nginx cache directories.
Figure 5: FlynCache Dashboard with Status Cards and Quick Actions
8. Admin Bar & Quick Actions
FlynCache adds convenient cache management options directly to your WordPress admin bar, allowing you to purge cache without leaving the page you are viewing. This is particularly useful when you are editing content and want to immediately see the changes reflected on the frontend without navigating to the FlynCache settings page.
Purge from the Admin Bar
When you are logged in to WordPress and viewing the frontend of your site, you will notice a “Purge Cache” option in the admin bar at the top of the page. Clicking this option will purge the Nginx cache for the current URL, ensuring that the next page load will fetch fresh content from WordPress. This is the quickest way to verify content changes after editing a post or page.
Purge from Post List
FlynCache also integrates with the WordPress post list screen (Posts > All Posts). Each post row includes a “Purge Cache” action link that allows you to purge the cache specifically for that post. This is useful when you want to refresh the cache for individual posts without affecting the rest of the site. The same functionality is available for pages and custom post types.
One-Click Full Purge
For situations where you need to clear everything, FlynCache provides a “Purge All” button on the dashboard. This single action clears the entire Nginx FastCGI cache, removing all cached pages and files. Use this option when you have made significant changes to your site, such as updating the theme, modifying global settings, or installing new plugins that affect the site’s appearance or functionality.
9. Cache Logs
FlynCache includes a comprehensive logging system that records every cache purge action performed on your site. The cache logs page provides detailed information about each purge event, including the timestamp, purge type, URL affected, trigger source, and status. This transparency helps you understand how your cache is being managed and troubleshoot any issues.
Viewing Logs
Navigate to FlynCache > Cache Logs to view all recorded purge actions. The log entries are displayed in a table format with sortable columns. Each entry shows when the purge occurred, what type of purge it was (full purge, URL purge, auto-purge), the specific URL or pattern that was purged, what triggered the purge, and whether the operation was successful.
Filtering Logs
You can filter the log entries by purge type and status to quickly find specific events. Use the filter dropdowns above the log table to narrow down the results. For example, you can filter to show only failed purge operations to identify and resolve issues, or filter by auto-purge to see which content updates triggered automatic cache purging.
Exporting Logs as CSV
FlynCache allows you to export your cache logs as a CSV file for further analysis or record keeping. Click the “Export CSV” button to download a comma-separated values file containing all log entries. This feature is useful for generating reports, analyzing purge patterns over time, or sharing log data with your development team or hosting provider.
Clearing Old Logs
Over time, the cache logs can accumulate a large number of entries. FlynCache provides a “Clear Logs” button to remove old log entries and free up database space. You can choose to clear all logs or only entries older than a specified number of days. It is recommended to periodically clean up old logs to keep the logging system efficient and your database optimized.
10. Support & Resources
FlynCache is actively maintained and supported by its developer, Wasim Akram. Whether you need help with installation, configuration, or troubleshooting, there are several channels available to get the assistance you need. The support page within the plugin provides quick access to all available resources and support channels.
Figure 6: FlynCache Support Page
Support Channels
| Resource | Link |
|---|---|
| Buy Me a Coffee | https://buymeacoffee.com/wasimb |
| Leave a Review | https://wordpress.org/support/plugin/flynginx/reviews/ |
| Documentation | https://digitalwasim.com/flynginx-support |
| Contact | https://digitalwasim.com/contact |
| Plugin Homepage | https://digitalwasim.com/flynginx |
Table 3: FlynCache Support Resources
If you find FlynCache useful, please consider supporting the development by buying the developer a coffee. Your support helps maintain the plugin and fund future updates. Additionally, leaving a review on WordPress.org helps other users discover FlynCache and provides valuable feedback for continued improvement.
11. Frequently Asked Questions
This section answers the most commonly asked questions about FlynCache. If you have a question that is not covered here, please visit the support page or contact the developer directly through the channels listed above.
Q1: Does FlynCache work without Redis?
Yes, FlynCache works perfectly without Redis. The Nginx FastCGI cache functionality is completely independent of Redis. Redis is only needed if you want to add an object cache layer on top of the page-level FastCGI cache. Many users run FlynCache with just Nginx FastCGI cache and achieve excellent performance results. Redis support is an optional enhancement for sites that benefit from database query caching.
Q2: How does auto-detection work?
FlynCache’s auto-detection feature scans common Nginx cache directory locations on your server. It checks paths like /var/run/nginx-cache, /var/cache/nginx, and other typical locations used by various control panels and server configurations. The plugin also reads your Nginx configuration files to identify cache zones and their associated paths. This intelligent scanning eliminates the need for manual path configuration and reduces the chance of errors.
Q3: Is it safe to purge all cache?
Yes, purging all cache is completely safe. It simply removes the stored cached files, which means your site will regenerate fresh pages on the next requests. There is no data loss or risk associated with purging the cache. The only temporary effect is that your site may be slightly slower for a short period immediately after a full purge, as new cache entries need to be created. This is normal behavior and resolves quickly as visitors browse your site.
Q4: Can I use it with other caching plugins?
FlynCache is designed to work alongside most other WordPress plugins, but it is generally not recommended to use multiple caching plugins simultaneously. If you are using a page caching plugin (such as WP Super Cache or W3 Total Cache), you should deactivate it before enabling FlynCache’s Nginx FastCGI cache, as having two page caching systems can cause conflicts and unpredictable behavior. However, FlynCache works well with optimization plugins that handle minification, lazy loading, and CDN integration.
Q5: Which Redis extensions are supported?
FlynCache supports both the phpredis PHP extension and the Predis PHP library. phpredis is a C extension that offers the best performance and is recommended for production use. Predis is a pure PHP implementation that does not require server-level installation, making it a good choice for shared hosting environments where you cannot install PHP extensions. FlynCache automatically detects which one is available and uses it accordingly.
Q6: How do I configure Nginx FastCGI cache?
Configuring Nginx FastCGI cache requires editing your Nginx server configuration files. You need to add a fastcgi_cache_path directive to your http block, define a cache key, and add cache-related directives to your server or location blocks. Section 12 of this guide provides a complete Nginx configuration reference with detailed explanations of each directive. If you are not comfortable editing Nginx configuration files, consult with your server administrator or hosting provider.
Q7: Will auto-purge slow down my site?
No, the auto-purge system has a negligible impact on site performance. Cache purging operations are lightweight and execute quickly. The auto-purge hooks are triggered during standard WordPress actions (publishing posts, updating pages, etc.), and the purge commands run asynchronously in most cases. The performance benefit of serving cached pages far outweighs the minimal overhead of the auto-purge system. You should not notice any slowdown from having auto-purge enabled.
Q8: How to submit a bug report?
If you encounter a bug or unexpected behavior, please report it through the WordPress.org support forums for the FlynCache plugin. When submitting a bug report, please include your WordPress version, PHP version, Nginx version, a description of the issue, steps to reproduce it, and any relevant error messages or log entries. Screenshots are also very helpful. You can also contact the developer directly through the contact page at digitalwasim.com.
12. Nginx Configuration Reference
This section provides a comprehensive reference for configuring Nginx FastCGI cache for use with FlynCache. The configuration must be applied to your Nginx server before FlynCache can manage the cache. Below is a complete example server block with detailed explanations of each cache-related directive.
Complete Server Block Example
The following is a complete Nginx server block configuration with FastCGI cache enabled. This configuration should be placed in your site’s server block file, typically located at /etc/nginx/sites-available/your-site.conf.
# HTTP block – define cache zone
fastcgi_cache_path /var/run/nginx-cache levels=1:2
keys_zone=WORDPRESS:100m inactive=60m max_size=1g;
# Server block
server {
listen 80;
server_name example.com;
root /var/www/html;
index index.php;
set $skip_cache 0;
# Don’t cache logged-in users or POST requests
if ($request_method = POST) { set $skip_cache 1; }
if ($http_cookie ~* “comment_author|wordpress_[a-f0-9]+|wp-postpass”) { set $skip_cache 1; }
location ~ \.php$ {
include fastcgi_params;
fastcgi_pass unix:/run/php/php-fpm.sock;
fastcgi_cache WORDPRESS;
fastcgi_cache_valid 200 301 302 60m;
fastcgi_cache_bypass $skip_cache;
fastcgi_no_cache $skip_cache;
add_header X-FastCGI-Cache $upstream_cache_status;
}
}
Directive Explanations
fastcgi_cache_path: Defines the directory where cached files will be stored, along with parameters like the keys_zone name and size (WORDPRESS:100m), inactive timeout (60m), and maximum cache size (1g). The levels=1:2 parameter creates a two-level directory structure for efficient file access. This directive must be placed in the http context, not inside a server block.
fastcgi_cache_key: Defines the key used to identify cached responses. The default and recommended value is “$scheme$request_method$host$request_uri”, which creates a unique cache entry for each URL and request method combination. This ensures that different pages and different request types (GET vs POST) are cached separately.
fastcgi_cache_valid: Specifies how long responses with specific status codes should be cached. For example, “200 301 302 60m” means that successful responses (200), permanent redirects (301), and temporary redirects (302) will be cached for 60 minutes. You can set different durations for different status codes.
fastcgi_cache_bypass: Defines conditions under which Nginx should bypass the cache and fetch a fresh response from the upstream PHP-FPM server. When $skip_cache is set to 1 (such as for logged-in users or POST requests), the cache is bypassed but the response may still be stored.
fastcgi_no_cache: Defines conditions under which Nginx should not store the response in the cache at all. Unlike cache_bypass, which still fetches from upstream but may or may not cache, no_cache prevents caching entirely. Both directives are typically set to the same $skip_cache variable for consistent behavior.
13. Publishing to WordPress.org
If you are a developer who has created a WordPress plugin and wants to share it with the world through the official WordPress.org plugin repository, this section provides a comprehensive guide to the entire process. Publishing on WordPress.org gives your plugin visibility to millions of WordPress users and provides a trusted distribution channel with automatic update capabilities.
Pre-Submission Checklist
Before submitting your plugin to WordPress.org, ensure that your plugin meets all the requirements:
- Code follows WordPress coding standards (use PHP CodeSniffer with WordPress ruleset)
- All PHP files include proper header comments with plugin name, version, author, and description
- Plugin is internationalization-ready with proper text domains and translation functions
- Security best practices are followed: data sanitization, escaping, nonce verification, and capability checks
- No deprecated functions or features are used
- Plugin does not include any external links or advertisements
- A valid readme.txt file is included in the plugin root directory
- Screenshots are included for the WordPress.org plugin page
Required Files and Their Purposes
| File | Purpose |
|---|---|
| readme.txt | Plugin description, installation instructions, changelog, and FAQ for WordPress.org |
| {plugin}.php | Main plugin file with header comments, activation hooks, and core functionality |
| uninstall.php | Cleanup script that runs when the plugin is uninstalled |
| screenshot-*.png | Screenshots displayed on the WordPress.org plugin page (up to 8 allowed) |
| banner-*.png | Banner images for the WordPress.org plugin page header |
| icon-*.png | Plugin icon displayed in search results and on the plugin page |
Table 4: Required Files for WordPress.org Plugin Submission
readme.txt Format Requirements
The readme.txt file is one of the most important files in your plugin submission. It must follow the standard WordPress.org readme format, which uses a specific markup syntax. Key sections include: a short description (limited to 150 characters), a detailed description, installation instructions, frequently asked questions, screenshots with corresponding numbered sections, a changelog, and upgrade notices. The readme.txt uses Markdown-like syntax where == Section Name == creates headings and the format is well documented in the WordPress Plugin Developer Handbook.
SVN Setup Instructions
WordPress.org uses Subversion (SVN) for plugin distribution. Follow these steps to set up your SVN workspace:
- Create a WordPress.org account if you do not already have one.
- Go to https://wordpress.org/plugins/developers/ and submit your plugin for review.
- Once approved, you will receive an SVN repository URL for your plugin.
- Install an SVN client (command-line svn, TortoiseSVN, or Versions).
- Check out the empty repository: svn co https://plugins.svn.wordpress.org/your-plugin/ .
- Your repository has three directories: trunk (development), tags (releases), and assets (banner and icon images).
- Copy your plugin files into the trunk directory.
- Add banner and icon images to the assets directory.
- Commit your changes: svn commit -m “Initial release v1.0.0”.
- Create a tag for your release: svn cp trunk tags/1.0.0, then commit.
Plugin Review Process
After submission, your plugin will go through a manual review process by the WordPress.org plugin review team. The review team checks for code quality, security, adherence to WordPress coding standards, and compliance with the plugin guidelines. The review process typically takes 1-7 business days, though it can be longer during busy periods. You may receive feedback requesting changes before your plugin is approved. Respond promptly to any review feedback and make the requested changes.
Post-Submission Steps
- Monitor your plugin’s WordPress.org page for user feedback and support requests.
- Respond to support forum questions promptly to maintain a good reputation.
- Update the readme.txt changelog with each new version release.
- Create new SVN tags for each release version to trigger the update mechanism.
- Regularly check for compatibility with the latest WordPress version and update accordingly.
- Maintain your plugin by fixing bugs and adding new features based on user feedback.
14. About the Developer
FlynCache is developed and maintained by Wasim Akram, a passionate WordPress developer with a focus on performance optimization and server-side caching solutions. With years of experience in WordPress development and a deep understanding of web server technologies, Wasim created FlynCache to solve a common pain point for WordPress site owners running on Nginx servers.
Wasim is dedicated to building high-quality, open-source WordPress plugins that make advanced web technologies accessible to everyone. His approach to plugin development emphasizes user experience, performance, code quality, and comprehensive documentation. Every plugin released under his name undergoes thorough testing and follows WordPress coding standards.
| Resource | Link |
|---|---|
| Website | https://digitalwasim.com |
| Blog | https://digitalwasim.com/blog |
| Contact | https://digitalwasim.com/contact |
| Buy Me a Coffee | https://buymeacoffee.com/wasimb |
| FlynCache Plugin | https://digitalwasim.com/flynginx |
Table 5: Developer Links and Resources
If you find FlynCache useful and would like to support its continued development, please consider making a donation through Buy Me a Coffee. Your support helps fund ongoing development, server costs for testing, and the creation of new features. Every contribution, no matter how small, is greatly appreciated and motivates further improvement of the plugin.
Thank you for choosing FlynCache. We hope it helps you achieve blazing-fast performance for your WordPress site!

